.JPG)
I decided to hop on the gun painting bandwagon and
have my S&W M&P 15-22 painted a cool and functional pattern, until I
saw the price tag. For what some of these companies charge for a paint job, I
could buy an entirely new gun. In addition, the durability of some of these coats is
highly
debated. I would hate to see a $400.00 paint job scratch off when I run it hard at a course; I decided to take matters into my own hands.
The alternative method I decided to proceed with would have to achieve:
debated. I would hate to see a $400.00 paint job scratch off when I run it hard at a course; I decided to take matters into my own hands.
The alternative method I decided to proceed with would have to achieve:
·
Functional design
·
Affordable application process
·
Scratch-resistant finish
·
Ease of application
·
Look somewhat cool
I had some familiarity with the old school
rattle can paint job we used in the military and it fit my needs perfectly. The price was the cheapest of all other options. I decided to go with Krylon
Camouflage spray paint and the Krylon Matte
clear coat to give the paint a better chance to stick to the gun. Conveniently, this adds a level of scratch resistance as well. I chose to use 4 colors
instead of 5 because my rifle is black to begin with. Using less than 4 colors
would be difficult to achieve a quality camouflage pattern.


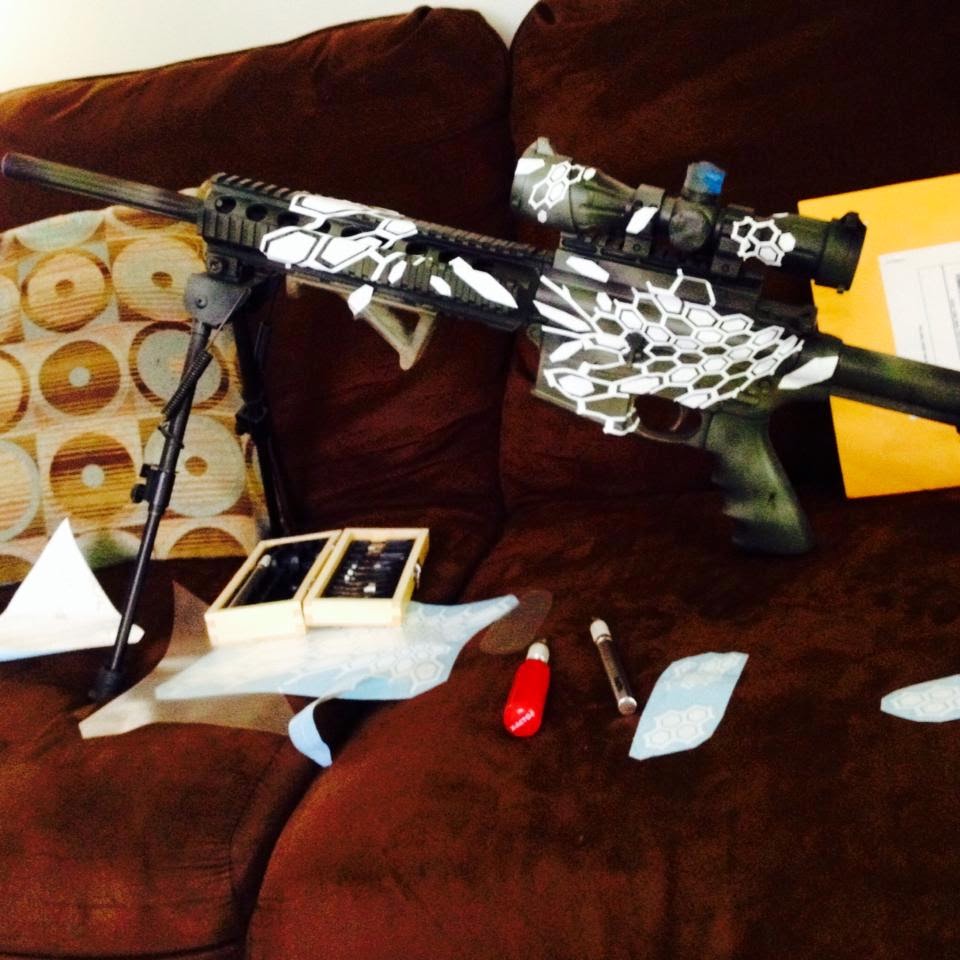
With the paint purchased and the stencils provided
by Ahab Tactical, I utilized their
“Hextek” pattern to show that the hottest new pattern can be done for under
$100.00. I have no real artistic talent to speak which made me a little nervous
about potentially ruining my gun. Luckily the stencils I ordered left little
room for mistakes on my end.
The amount of stencils provided were enough to
paint 4 rifles easily. I painted my old SOG Seal pup and sheath for a practice
run.


I was satisfied with both the pattern and the finish so I decided to green light the gun to be painted. The process of painting the gun is beyond easy.
- Clean the
gun thoroughly
- Tape off
everything that you don’t want painted (bolt, optics, muzzle, etc.)
- Apply coat
of clear (for better adhesion)
- Apply your
desired base coat (I did a basic tiger stripe pattern)
- Allow this
to dry completely
- Apply coat
of clear
- Let it dry
- Apply
stencils (An xacto knife will aid in trimming to fit)
- Hang item
to be painted in a well ventilated area
- Apply “Main
Coat” (Try to alternate colors and don’t paint in straight lines)
- Let it dry
- Remove
stencils carefully (Don’t forget to remove the smaller hex stickies!)
- Let it
DRY!!
- Apply clear
- You will
notice the pattern needs to be broken up a bit so harness your inner Bob
Ross and lightly go over the pattern with your main color, just enough to
eliminate hard lines.
- Let it dry
- Final coat
of clear (I did three)
- Sit back
and enjoy your handy work!!


The hardest part of this process is actually waiting for the various coats to dry. Applying the clear coat is essential for this paint job to be scratch resistant. If you don’t fade out the hard lines of your beautiful new pattern it will look like crap. Keep in mind that the entire point of this is to blend in to your surroundings.
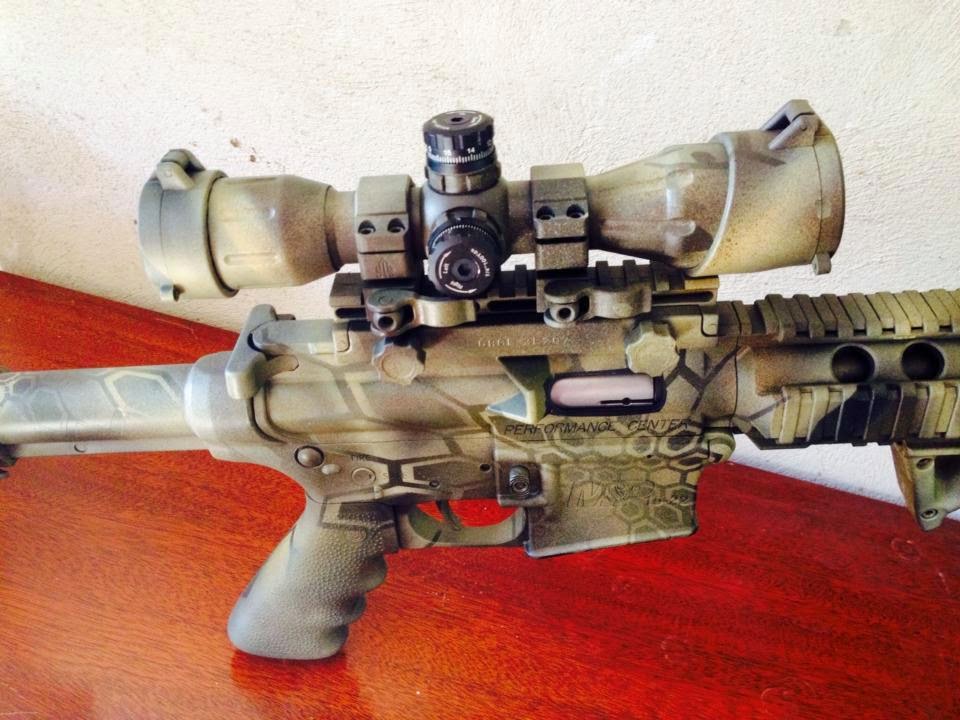


As I mentioned in the beginning, this paint job is
intended to be scratch-resistant. If normal wear and tear occurs on this coating, I still have enough paint and stencils to do numerous touch-ups. I'm banking on the fact that my multiple coats of paint can not be penetrated...even when Captain Butterfingers drops my rifle onto gravel. The total cost for me to do this paint job was $70.00 and took
me 2 days to complete. But don't let that discourage you from trying this yourself. The actual time spent applying the stencils and painting was about two hours. The drying time aka drinking time, accounts for the remainder of the two days spent.
If you have the money to spare to have a company
paint your gun, make sure you check their work prior to making a commitment. There are some real gifted people out there and then there are some really bad companies
as well. Do your research and check references!
Please share with me your thoughts on painting your
firearms, would you rather pay a pro to paint it or do it yourself? Feel free to shoot me any questions you have on the DIY painting process.

Stay fit and Keep that Warrior Mindset!
No comments:
Post a Comment